
Continuing on with my hiatus from scratch building large structure projects due to both the investment in time and space combined with limited space on my layout, I was looking for a small project that I could take on that would satisfy my interest in board by board construction.
A picture of a kit for a road side refreshment stand caught my eye, but since my layout is of a very rural farming setting, I decided to transform that picture into a road side produce stand building project.
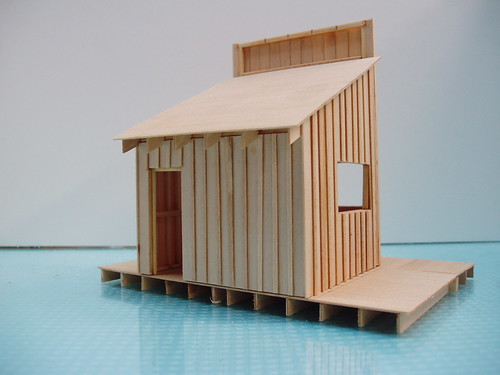
The plan & design for this structure was have a small building with a false front leaving the interior framing exposed. Two side windows and 1 large front window that will be hinged to open upwards were part of the design for both displaying and selling produce which would require some shelving to be installed flush in the window areas. The exterior will be done up with board & batten siding.
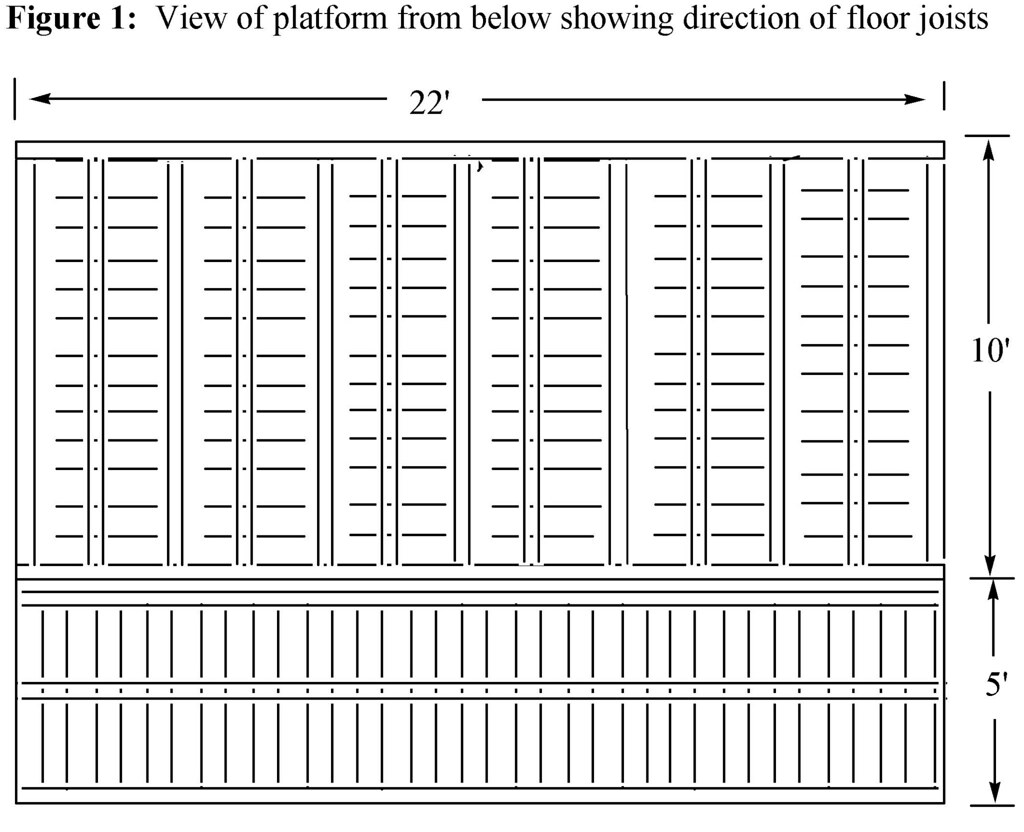
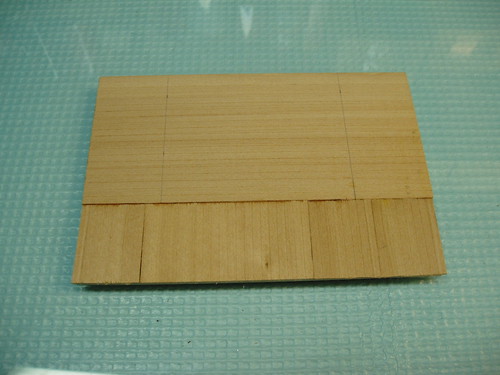
The construction starts with the platform for the stand (Pictures 1 & 1a, Figure 1). This was envisioned to be basically open wooden joists setting on the ground with floor boards holding it all together. I started out with a 10’ x 22’ section of scribed siding (1/8” x 1/32”) with some HO 4” x 22” joist cut to 9’ 10” set at ~ 2’ intervals. The end was then capped with 3 HO 4” x 22” joists cut to 22’ long. The exposed surface that this created was used to anchor a 5’ x 22’ section of scribed siding (1/8” x 1/32”) oriented at right angles to the other flooring. Two more 22’ joists under this section finished off the platform. The two lines in Picture 1 define where the produce stand superstructure was planned to be installed.
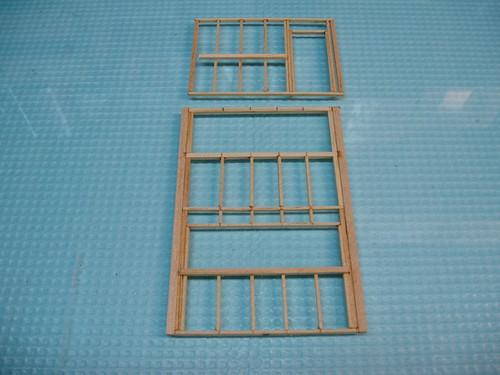
Construction of the stand itself began with the 2 side walls since these were planned to be mirror images (Picture 2, Figure 2). I build it on a section of ¼” plate glass which insures that I have a flat surface and even if I glue the framing to the glass, I can slip a single blade razor or scalpel blade under it to free my work without any damage.
The construction of all of the walls begins with 2” x 4” and 4” x 4” stock and is completely board by board building up the walls pretty closely to how one might do this in reality. The studs are doubled about the window and door opening and since I planned on leaving the framing completely exposed on the interior I really wanted to get all of in place cleanly. I used a Chopper III from NWSL to make consistently long studs and I also use a scalpel for the rest of my carpentry. The 4” x 4” angled support for the outer roof rafter was mortised into place as well to insure a good tight and strong joint. All of the joints that involve end grain were made with Goo while the rest of the assembly was done with ACC.
The back and front walls were similarly constructed (Picture 3, Figure 2). Along the interior flush with the top of the bottom of the window openings I added a 4” x 4” to support a “to be added” shelf. The ones on the side walls were relieved so as to allow these to match up when the walls were assembled. A similar section of 4” x 4” was also added across the back wall. The inside of the door framing also received some door stop trim (2” x 2”) so that the door would have something to close against.
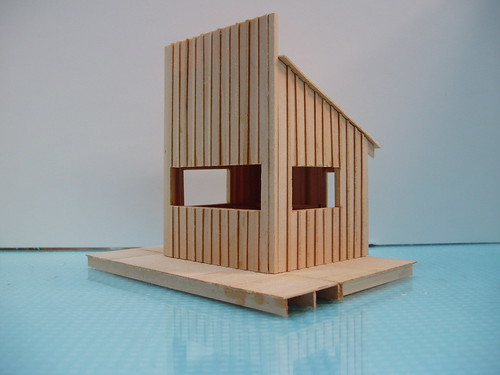
Now, after the framed walls were flipped over to take advantage of building on glass, the exteriors were sheathed with HO 2” x 20” with O scale 1” x 3” for the battens. The window openings were trimmed out while the siding above the angled 4” x 4” on the side walls was left long to accommodate a 4” x 22” rafter cut to match that slope. The sheathing from the backs of the side walls was also left long to overlap with the back wall framing when the walls were assembled (Pictures 4 & 5). This also necessitated mortising the 2 outside rafters and thus all of the rest of the rafters as well.


With the 4 walls basically completed, it was time to assemble them into the structure. The back framing of the side walls with the extended sheathing provided a pocket for the corner 4” x 4” ends of the back wall to fit into, also insuring a measure of “square” to the corner. These joints were secured with Goo. The front edges of the side walls were also then secured flush to the back of the 2 main support beams of the false front with Goo. After the walls were set, I planted the entire unit onto the platform centered between those two lines with the back wall flush with the back of the platform (Picture 6). On to the roof!
Ok, this is really a 3 step process.
Step 1 -- MinWax - good old fashioned nasty smelling paint thinner variety - in this particular case - Pecan. why? Because I like the color for interiors and I just slop it on the whole structure inside & out.
Step 2 -- couple of days later (could be sooner actually) a thick coat of one of the Floquil GL (gloss!!!) colors. In this case I used something new - CSX Grey GL. Again, pretty much slop it on wherever the crackled paint affect is desired. sheltered areas of a building don't get any....or not much
Step 3 -- before that paint is 100% dry (I was actually working around a few puddles of the grey this time...), a coat of Polly Scale Aged White...working pretty carefully but quickly....

Now, here's the disclaimer:
I don't know how this works with other Polly Scale colors other than a few when in combination with CSX Grey GL. I tested a handful that I liked for the exterior and the white came up best. What Polly Scale works best with which Floquil GL color over which MinWax is a never ending experiment. I know a few combinations that work very well, and some that don't.
Some barely work at all............
Lastly, it works a lot better if you put down thh MinWax 1st; I think that seals the wood surface and really forces the mixed paint interaction between the solvent based Floquil and the water/alcohol based Polly Scale as opposed to letting the Floquil solvent soak into the wood which also slows down the drying rate.
And, I think there is something to the actual colors as well - 2 that I tested and I tested 7 at the same time on 1 piece of clapboard, completely failed to crackle at all.
I've tested 3 of the Gloss Floquils now each with 7-9 Polly Scale colors - some work great at crackling, some work so-so, some don't work at all.





No comments:
Post a Comment