Sunday, July 25, 2010
June Token Build : Stand Up
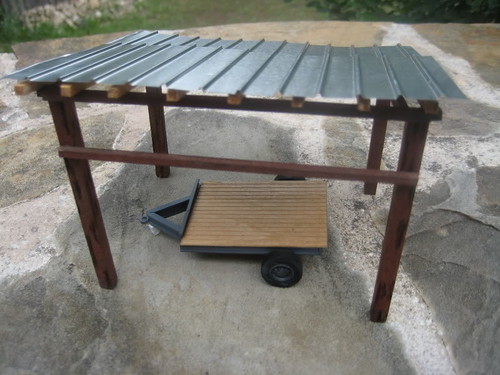
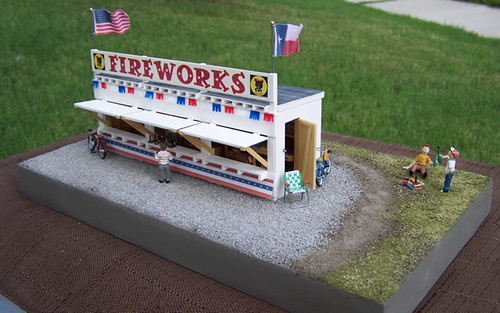
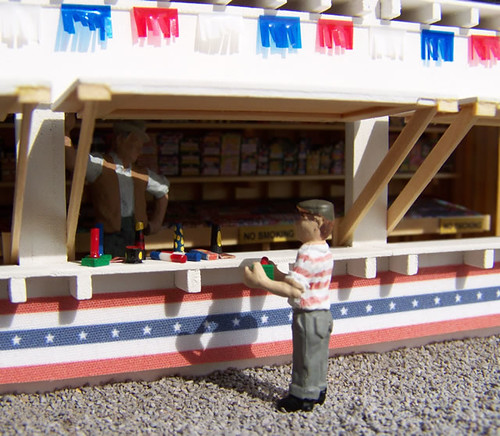
Continuing our theme of community based builds, the month of June brought a new opportunity for those participating to hone their skills constructing a stand of their choosing. As with all of our Token Builds, a wide variety of interpretations were displayed yet all within the theme that was agreed upon. I'm sure you will agree that they all did a fantastic job with each one 'stand' - ing on its own.
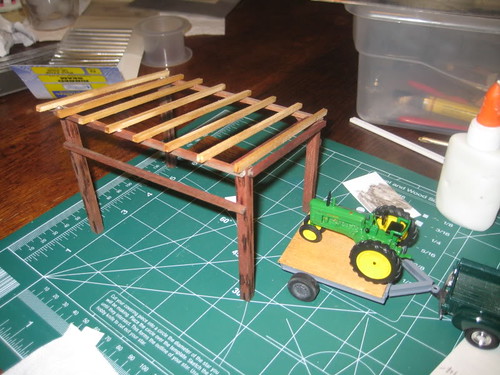
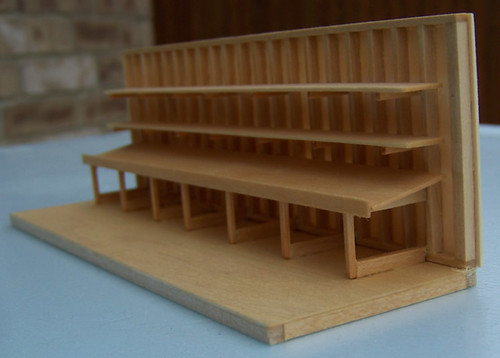
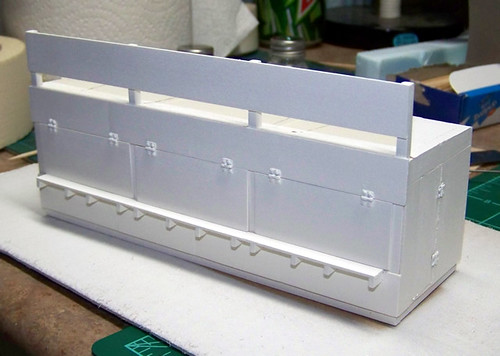
The first step of all our builds involved creating the skeleton of the structure. Walls, floor, and roofs are often constructed as separate pieces coming together to form the basis for the rest of the build. The stage of the build is probably the most important of all and provides the framework from which the rest of the project takes shape.
The separate sections are then put together to form one piece. What the projects previously had in common now takes shape as unique representations of the builder's personal choice of stand.
Paint, stains, and weathering are added to give the stands some character along with unique details and features.
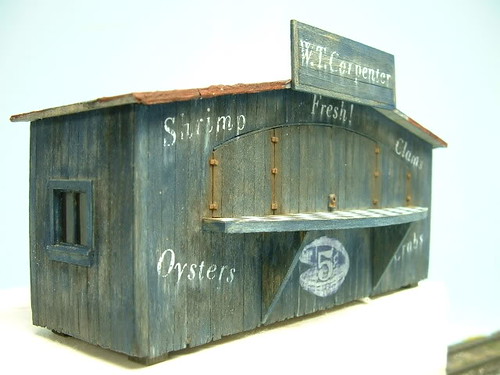
At last, the final stage: the finished product. With some hard work and imagination, these projects stand tall as their own pieces of Token Art.
As with all of the token builds, many thanks to those brave souls who not only participated but took the time to share the steps in their building process. It continues to be a pleasure to see individual progress and the novel interpretations on our theme. For those who participated, I hope to see you back for another adventure. To those who have considered joining, please stay tuned for our next build in August to see if its something you can stand.
Saturday, July 24, 2010
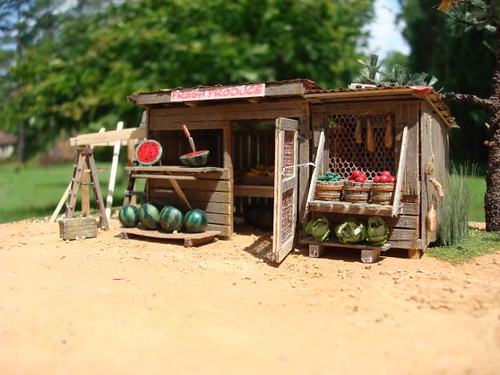
A Roadside Produce Stand by mwb
Continuing on with my hiatus from scratch building large structure projects due to both the investment in time and space combined with limited space on my layout, I was looking for a small project that I could take on that would satisfy my interest in board by board construction.
A picture of a kit for a road side refreshment stand caught my eye, but since my layout is of a very rural farming setting, I decided to transform that picture into a road side produce stand building project.
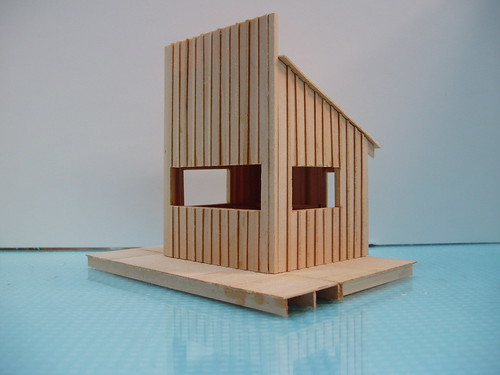
The plan & design for this structure was have a small building with a false front leaving the interior framing exposed. Two side windows and 1 large front window that will be hinged to open upwards were part of the design for both displaying and selling produce which would require some shelving to be installed flush in the window areas. The exterior will be done up with board & batten siding.
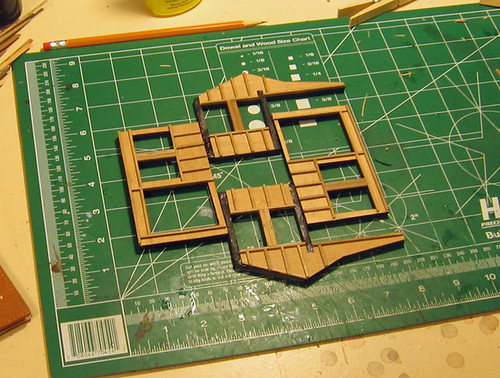
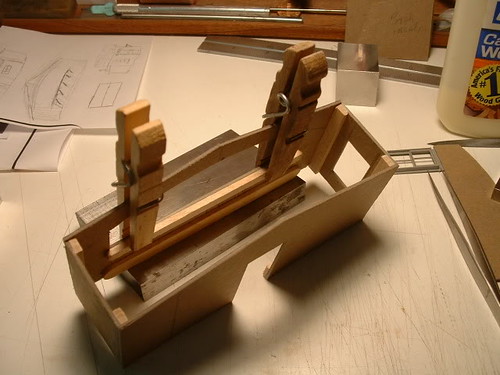
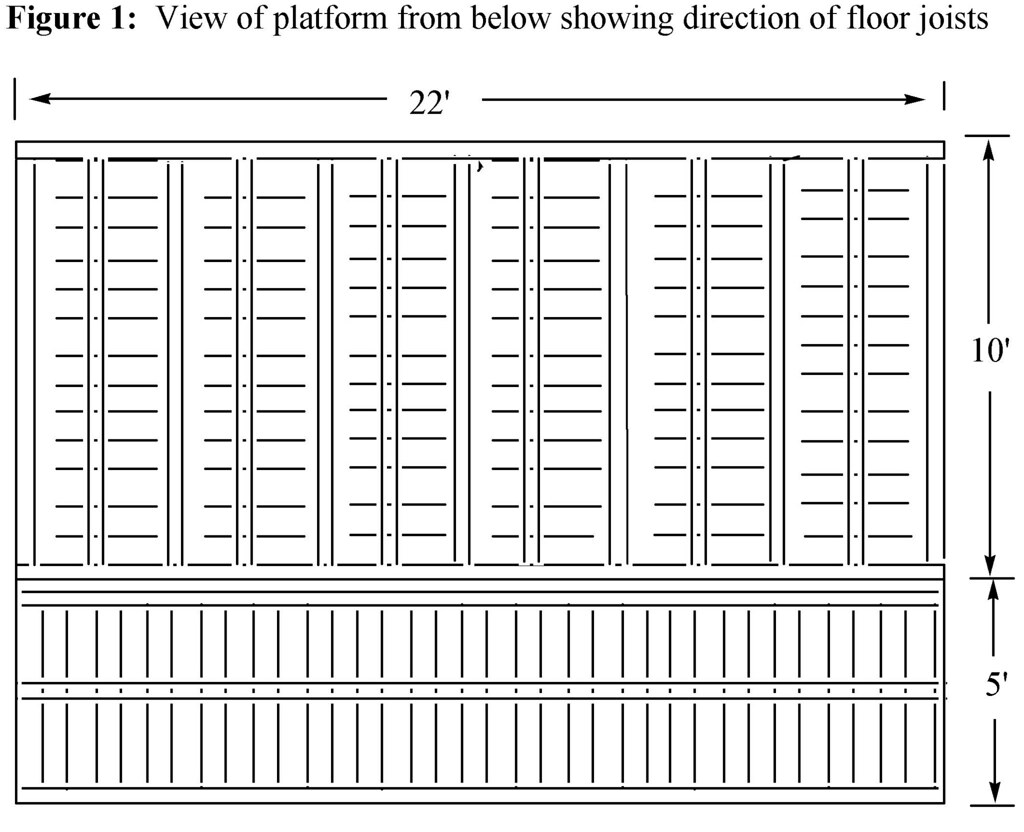
The construction starts with the platform for the stand (Pictures 1 & 1a, Figure 1). This was envisioned to be basically open wooden joists setting on the ground with floor boards holding it all together. I started out with a 10’ x 22’ section of scribed siding (1/8” x 1/32”) with some HO 4” x 22” joist cut to 9’ 10” set at ~ 2’ intervals. The end was then capped with 3 HO 4” x 22” joists cut to 22’ long. The exposed surface that this created was used to anchor a 5’ x 22’ section of scribed siding (1/8” x 1/32”) oriented at right angles to the other flooring. Two more 22’ joists under this section finished off the platform. The two lines in Picture 1 define where the produce stand superstructure was planned to be installed.
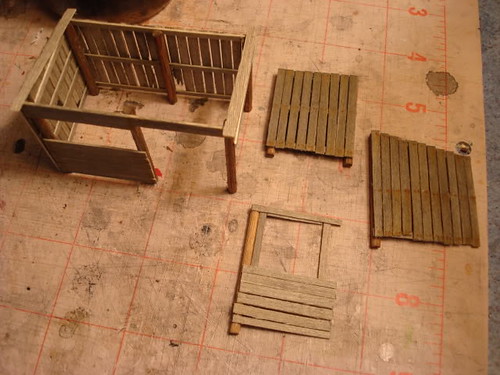
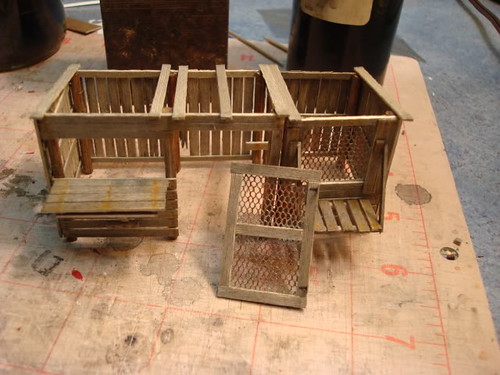
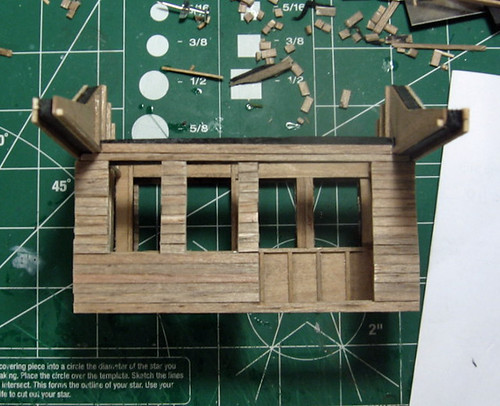
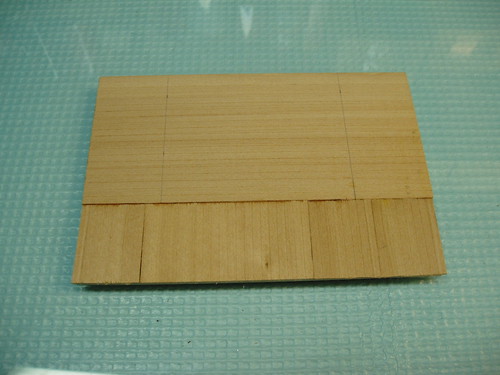
Construction of the stand itself began with the 2 side walls since these were planned to be mirror images (Picture 2, Figure 2). I build it on a section of ¼” plate glass which insures that I have a flat surface and even if I glue the framing to the glass, I can slip a single blade razor or scalpel blade under it to free my work without any damage.
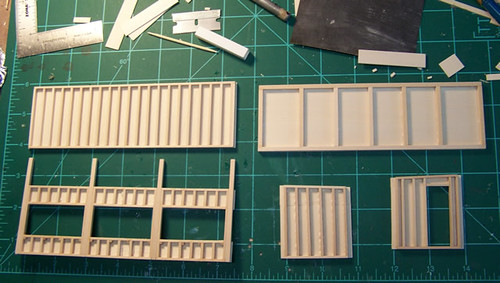
The construction of all of the walls begins with 2” x 4” and 4” x 4” stock and is completely board by board building up the walls pretty closely to how one might do this in reality. The studs are doubled about the window and door opening and since I planned on leaving the framing completely exposed on the interior I really wanted to get all of in place cleanly. I used a Chopper III from NWSL to make consistently long studs and I also use a scalpel for the rest of my carpentry. The 4” x 4” angled support for the outer roof rafter was mortised into place as well to insure a good tight and strong joint. All of the joints that involve end grain were made with Goo while the rest of the assembly was done with ACC.
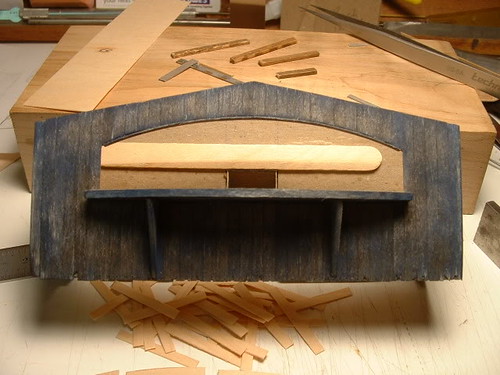
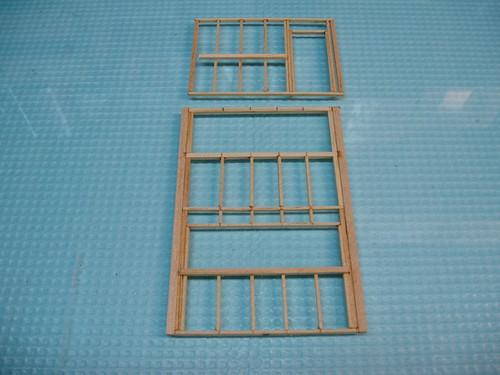
The back and front walls were similarly constructed (Picture 3, Figure 2). Along the interior flush with the top of the bottom of the window openings I added a 4” x 4” to support a “to be added” shelf. The ones on the side walls were relieved so as to allow these to match up when the walls were assembled. A similar section of 4” x 4” was also added across the back wall. The inside of the door framing also received some door stop trim (2” x 2”) so that the door would have something to close against.
Now, after the framed walls were flipped over to take advantage of building on glass, the exteriors were sheathed with HO 2” x 20” with O scale 1” x 3” for the battens. The window openings were trimmed out while the siding above the angled 4” x 4” on the side walls was left long to accommodate a 4” x 22” rafter cut to match that slope. The sheathing from the backs of the side walls was also left long to overlap with the back wall framing when the walls were assembled (Pictures 4 & 5). This also necessitated mortising the 2 outside rafters and thus all of the rest of the rafters as well.
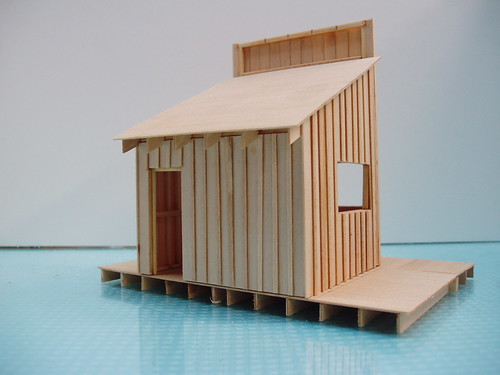
With the 4 walls basically completed, it was time to assemble them into the structure. The back framing of the side walls with the extended sheathing provided a pocket for the corner 4” x 4” ends of the back wall to fit into, also insuring a measure of “square” to the corner. These joints were secured with Goo. The front edges of the side walls were also then secured flush to the back of the 2 main support beams of the false front with Goo. After the walls were set, I planted the entire unit onto the platform centered between those two lines with the back wall flush with the back of the platform (Picture 6). On to the roof!
Ok, this is really a 3 step process.
Step 1 -- MinWax - good old fashioned nasty smelling paint thinner variety - in this particular case - Pecan. why? Because I like the color for interiors and I just slop it on the whole structure inside & out.
Step 2 -- couple of days later (could be sooner actually) a thick coat of one of the Floquil GL (gloss!!!) colors. In this case I used something new - CSX Grey GL. Again, pretty much slop it on wherever the crackled paint affect is desired. sheltered areas of a building don't get any....or not much
Step 3 -- before that paint is 100% dry (I was actually working around a few puddles of the grey this time...), a coat of Polly Scale Aged White...working pretty carefully but quickly....
Now, here's the disclaimer:
I don't know how this works with other Polly Scale colors other than a few when in combination with CSX Grey GL. I tested a handful that I liked for the exterior and the white came up best. What Polly Scale works best with which Floquil GL color over which MinWax is a never ending experiment. I know a few combinations that work very well, and some that don't.
Some barely work at all............
Lastly, it works a lot better if you put down thh MinWax 1st; I think that seals the wood surface and really forces the mixed paint interaction between the solvent based Floquil and the water/alcohol based Polly Scale as opposed to letting the Floquil solvent soak into the wood which also slows down the drying rate.
And, I think there is something to the actual colors as well - 2 that I tested and I tested 7 at the same time on 1 piece of clapboard, completely failed to crackle at all.
I've tested 3 of the Gloss Floquils now each with 7-9 Polly Scale colors - some work great at crackling, some work so-so, some don't work at all.
Friday, July 23, 2010
Lawn Chairs
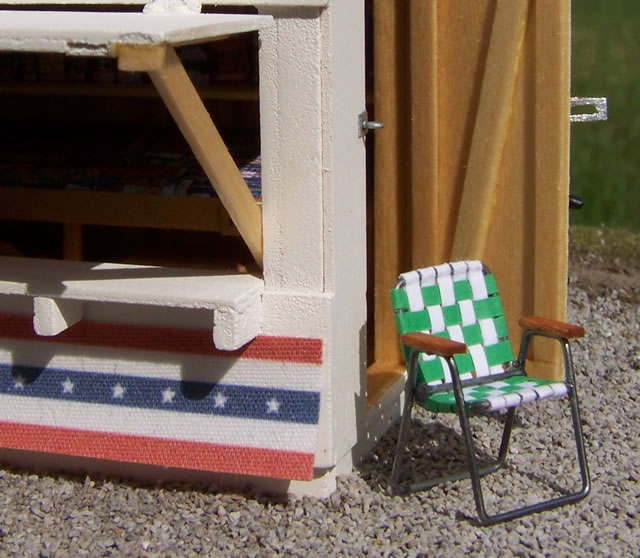
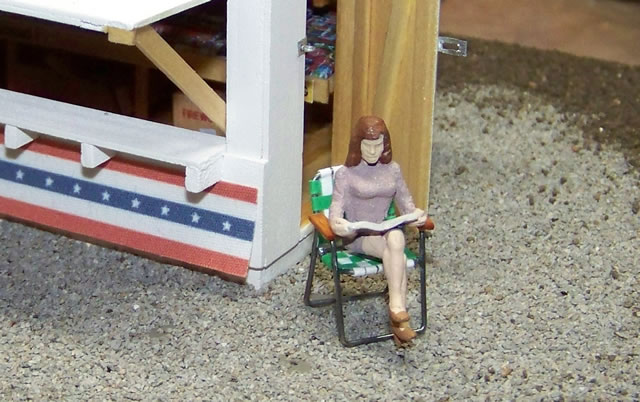
Folding lawn chairs are and have been a fixture in American life. Making an O-Scale lawn chair is a pretty straight forward project that only takes a 2 to 3 hours to make. You don’t need to be exact, and are only trying to capture the visual appearance of a folding lawn chair. To start this project, I would recommend either looking at a lawn chair you already own, or do a quick search on the internet to find a view that shows a lawn chair from the side. This will help you better visualize the angles of the back and the legs.
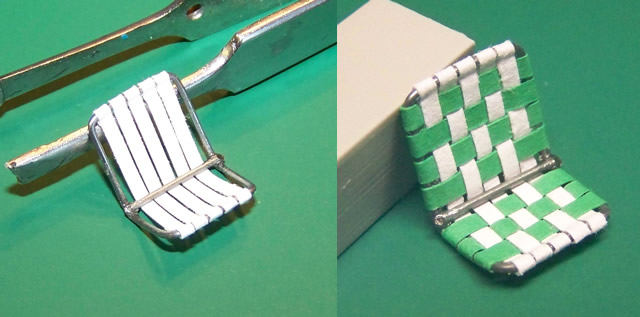
The basic frame for the lawn chair is galvanized steel wire that can be found at any home improvement store like Lowes or Home Depot. The steel wire is used for picture frame hanging, and can be found typically in the hardware section. For this project, I used 20 gauge or 22 gauge steel wire. Using your lawn chair or a photo as a guide, take a pair of needle nose pliers and bend up the frame that will make the seat and back portion of the chair. As you bend the wire into basically a rectangle that is bent in the middle, the wire will automatically take on proper looking curved bends at the corners due to the rounded tip of the pliers. This framework should be about 3/8” wide, with the lower seat section about 11/32” long, and the upper back section 17/32” long. These dimensions were just eyeballed by using a seated Arttista figure as a guide, and by looking pictures of a typical lawn chair. Keep in mind that these dimensions are not super critical. You will want to go with what looks right to you. The important thing is to make sure that the rectangle has close to 90-degree bends at the corners so that the rectangular frame is parallel across its width, and from lower front to upper back. Also, pay attention to the fact that the upper back on a lawn chair is not perpendicular to the lower seat. The back generally will tilt back about 15 to 20 degrees. To complete this frame, cut a straight piece of wire that is as long as your frame is wide, and use CA glue to attach it to the top of the frame at the bend between the lower and upper section. Without this wire, the webbing will not be able to bend around and go from the seat to the back, just like a real lawn chair.
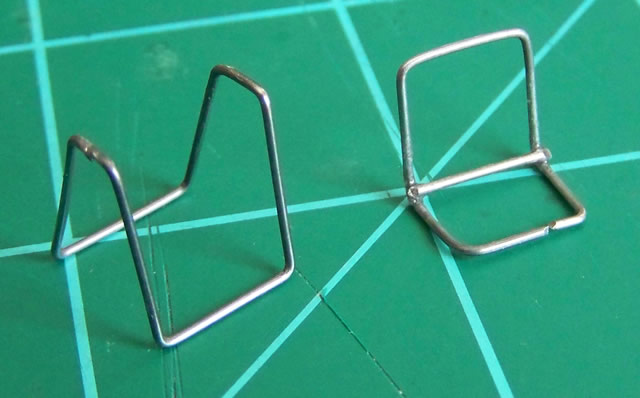
Since it is practically impossible to replicate all of the folding tubes that make up the legs and arm rests, you only need to visually capture the look of this portion of the frame. Again., using the same steel wire and needle nose pliers, you will need to bend up this section to look similar to the photo below.
Because you will not have a square cut on the ends of the wire, make sure that the break in each bent frame is in an area that will be hidden. For the chair seat / back, put the break near the middle of the lower front wire, as this will be hidden under the webbing. For the legs / arm rests, put the break on one of the top portions that will be hidden under an arm rest.
The webbing for the lawn chair will be made from just ordinary colored copier paper. I went to Office Depot and bought two sheets [1 white and 1 green] for $.04. You’ll want to pick a sheet that is fairly lightweight. Cut the paper into strips just a fuzz under 1/16" wide. The important thing is to cut the strips quite a bit longer than you need to cover the seat and back, because it helps a lot with trying to manipulate them in place. I would recommend making the strips 2” to 2-1/4” long.
To start attaching the webbing, you’ll want to start with all of the strips that run in the vertical direction of the chair [lower front edge to upper back edge]. Starting at the lower seat, curl the strip around the wire, and glue it back onto itself on the underneath side. This will go easier and faster if you use a fast drying white glue like the Scotch Tacky Glue. This glue will dry in under 30 seconds when bonding paper. You will continue attaching all of the webbing strips across the lower width of the chair. When done, you will then need to snake the strips under the wire at the seat bend, and back over the front of the upper back. Next, curl the strips over the upper back wire, and then trim them to the final length that will allow you overlap each strip over itself on the backside by about 1/8”. Glue each strip back to itself on the back side.
With the vertical strips in place, you will now need to weave the horizontal strips cut from a contrasting color through the vertical webbing. Again, make the strip lengths about an inch or so longer than you need. I found it was easier to weave through all of the strips in a section that overlap the same way... over the outside wire and under the first white strip... at the same time. Then use a dental pick to spread these apart once woven through. Going this route makes the alternate weave strips easier because you have only two strips to weave under instead of three. To weave the alternate strips, curl the strip and poked it through straight down at 90 degrees between the vertical strips, and then curl back the other way to come back from the backside. Don't worry about mangling this end of the strip to get it through. Because you made these strips longer, you just take tweezers and pull the strip out until the mangled end is beyond the end of the wire. To attach the horizontal webbing to the frame, you will use the same technique as the vertical webbing and glue the strip back onto itself on the backside. Start with the lower seat first, and then do the upper back portion. It will be easier if you glue all of the strip ends on one side, and then glue all of the strip ends on the opposite side after you have trimmed them to their final length.
Now we are ready to assemble the chair portion to the legs portion. To get the chair level to the bottom of the legs, take a piece of 5/16" square tubing and set it over the lower leg runs. Next, place the chair portion on top of the tubing, and align it so that the straight wire at the bend from chair seat to chair back is just inside the back legs. Use some CA glue to glue the points where the chair portion comes on contact with the leg section. When the glue is dry, slide out the square tubing.
To make the arm rests, use 1/32" thick basswood and cut a strip 1/16" wide by at least ½” long. You will want to have a good contact surface for the arm rests to attach to the wire. Use a dental pick to form a groove or notch running down the length and on the backside of the strip that will be set over the wire. Cut the basswood into two 1/4" long pieces, and then CA glue them onto the wire. When dry, you will need to apply a stain to color the arm rests whatever color you would prefer. On the chair I made, I used a natural redwood stain from a sample pack I got at Lowes to stain the basswood.
It took me about an hour to bend up the wire, about 1-1/2 hours to weave the strips, and 15 minutes to make the arm rests. If you do this as a production run and make several chairs at one time, It will go a lot quicker. It takes a little bit of time to initially size your bent wire frame and to learn the best way to weave the strips.
This project may “appear” to be challenging, but it really is pretty easy once you started bending the wire and weaving the webbing strips. Don’t be intimidated…. Just jump in and you’ll have fun making a sliver of Americana that is seldom seen on layouts. You CAN do it!
Thursday, July 22, 2010
Shipping Cases
Creating realistic shipping cases is an easy one-day scenery project that can be done by any modeler, regardless of their skill. These shipping cases can be used just about anywhere on a layout from inside a box car, on a freight platform, to interior detail for any storefront or industrial warehouse. To create a shipping case, you will need to make an outer “skin” [or use the linked template below], and wrap and glue this to a rigid block to form the case. The only time consuming aspect of this project is creating the case skin. If you are used to working with your graphics software program, or if you want to create a different sized case, the instructions to create a skin are below. Or you can choose to use the skin template I’ve created, and skip down to making the case.
On the box size, I went with a scale 18” x 18” x 24” long case. I chose this size because it is a fairly standard size, and by having the width and height the same dimension it will make it easier to make the block that you’ll be wrapping the skin around. You can go with different dimensions… it will just create a little extra work. An 18” x 18” x 24” long case scales out to 3/8” x 3/8” x ½” at 1:48 scale.
Getting the color right to mimic the color of corrugated cardboard can be tough by using just colored paper or selecting a color from the available palette in a graphics software package. Corrugated cardboard has a lot of subtle hues, and shipping cases are rarely ever pristine without any sealing tape or shipping rubs and damage. For this project, I wanted the cases to look as realistic as possible, so I took digital photographs of a couple of cases I had that had been previously shipped. I picked a case that was fairly clean, and one that had some shipping damage. This will give you some variation in your case skins. Make sure that when you take your digital images that you have plenty of lighting, or your images will be too dark when they get scaled down. Take pictures of both the end and side of your case(s). This will ensure that you get the proper views so that the shipping tape will look correct. Make sure when taking the pictures that you hold your camera straight on and parallel to the case, and back about 36”to 48”. This will help eliminate any foreshortening of the case height / width / length, and will make it easier when cropping your images.
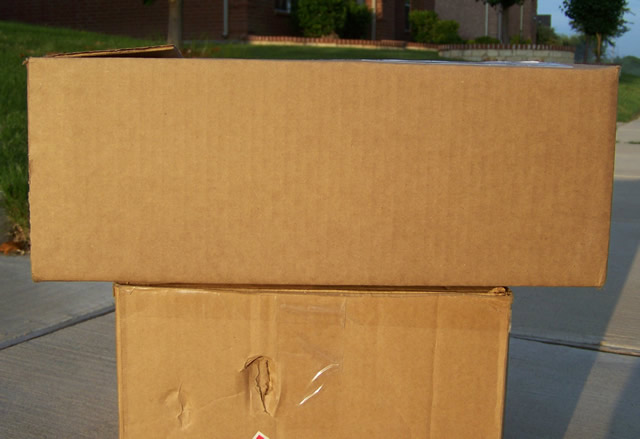
Using a graphics software program, crop your digital images for both the end and side view. It doesn’t have to be perfect, just make sure that your cropping selection is just inside the outer case edges so that you don’t pick up any pixels that feather the case edge with the photo background. Next you will need to create a new graphics file, and size it to about 8” x 10”, so that it will completely print on a single sheet of paper. If your software allows you to set your image resolution, pick a resolution that will allow for easier math. In my case, I went with 150 pixels to the inch, but should have went with 160 pixels to the inch to make these easier. I chose this resolution because 3/8” equals to 56 pixels, and ½” equals 76 pixels; or 60 pixels and 80 pixels at 160 pixels/inch. Do a copy and paste of your two cropped case views into your master graphics file. Next, you will want to resize the cropped image of your case end to match your desired scale size, which in my case was 56 pixels x 56 pixels. Do the same thing for the side view. Again, for the size and resolution I picked, it was 56 pixels tall x 76 pixels long. At 160 pixels per inch, it would be 60 x 60 pixels and 60 x 80 pixels.
Next, you will need to create your flat pattern for your case. Copy as necessary the images, and place them with an end view on each side of the side view. Copy the side view and place it against one of the ends so that you end up with a back side, end, front side, and then end. You will need to make some flaps to wrap around the bottom of your forming block, so take your end and side images, copy them, and crop them down to a narrower height. 20 pixels works well for these bottom flaps. You don’t want the bottom of the case to be fully wrapped with your skin so that you will have a good surface to glue your case to whatever surface you’ll be placing it on. When cropping for the bottom flaps, remove the upper portion of the image because the colors of the cardboard will only match on the common side. Next, you will need to flip or mirror your flap pieces before placing against the bottom of the ends and sides. Again, this is needed to make sure that you are creating a mirrored flap for each end and side so that the colors match perfectly. For the top flaps, you will need to once again copy your end and sides, and then flip or mirror them around. On the top flaps, use the full height of your end and side images. This will allow you to have proper flap widths if the case is to be made with the flaps open, or will give you full top coverage if you make the case with the flaps closed. Place these images up against the corresponding ends and sides. Lastly, you will need to make one more narrow flap that will be placed against the outer end side, by using the same techniques described above. This flap will be your initial flap that you will glue to your forming block when wrapping and gluing the sides and ends around your block. If you don’t have this flap, you will end up with one side/end corner that your paper edges may or may not line up perfectly. By having this flap, and wrapping the back side of the case over it when gluing, you won’t have to deal with not having enough “skin” to hide any mismatches.
For the next step, you will need to create some folding and cut lines for your skin pattern. Draw either lines or rectangles that match up with the sizes of your ends/sides/flaps. Your lines and rectangles need to be 1 pixel thick. Choose a light to medium brown for the line and rectangle color. You want a brown that is just dark enough to see when printed out. Look at the image below to get an idea of what you are trying to achieve with these lines. On cases where you decide to go with a closed look, the brown line in the middle of the top flap attached to a side will end up looking like a closed flap seam.
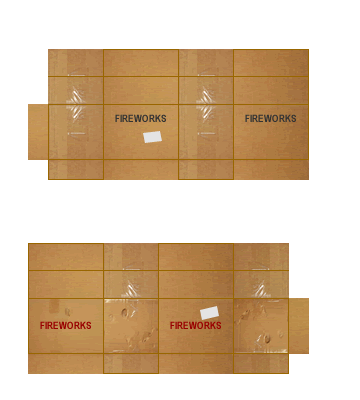
At this point, you will have your base skin template done. If your graphics program supports grouping objects, select all of your images, lines, and rectangles; and then group them into one block. Do a copy, and then paste the single case template multiple times on page. If you paste your copied block directly over the original image, and then use your arrow key to move the block either up or down, you will keep the blocks inline in both columns and rows. This will make cutting them out easier, as you will be able to trim across multiple blocks at one time. For my use, I copied the blocks to give me sixteen (16) skin templates per sheet. If you are creating two different looking shipping cases… clean and with shipping damage like I did… you would create the second skin template exactly like the first one.
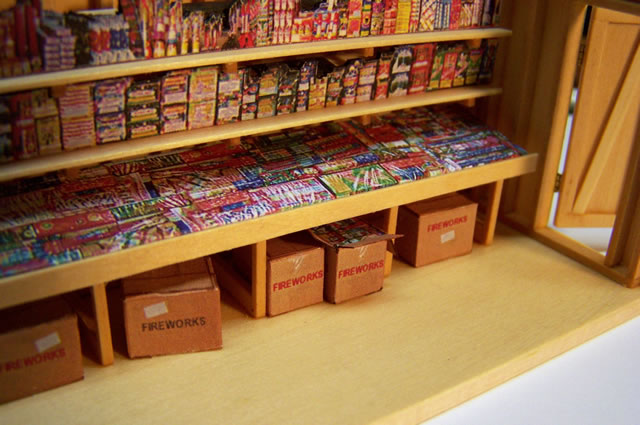
Now you are ready to add any custom features to your skin templates. For my use, I added the text “FIREWORKS” to various box sides in both different locations and in two different colors. I also added a small rectangle to look like a shipping label on some of the case skins. Go with a light grey color for your rectangle fill. Pure white would look too contrasting and would stand out too much on your final product. Make sure that you place these shipping labels in random locations, and rotate them differently to give some randomness to your finished cases.
With your page of case skins done, print it out. I used regular copier paper and an ink jet printer. Next, spray your printed sheet with a flat finish like Krylon Matte Finish to seal the paper.
Below is a link to a skin template that you can use. The cases are generic, and you can add whatever text or graphics to the individual cases to meet your needs prior to printing. This file is a vector based .PNG. If you are using a graphics program like Fireworks from Macromedia, this template will be fully editable. For other programs, you should still be able to edit the file images, at least be able to add your own text or graphics. On this template, you will see that some of the skins are set up for just three box sides. When I created this template, I knew I had some cases that I wouldn’t have an end that showed, so I didn’t add this end on. In hindsight, I didn’t need to do this because you can, and will, cut out the portions of the skin that you don’t need.
Link to Case Template File
Now we are ready to make some shipping cases!
Because of the case size I picked, I took some 3/8” square dowel, and cut it into 1/2" long pieces. This will make the block that you will wrap the skin around. Take care when cutting your dowel to make sure the cut ends are square. Otherwise, this will cause the skin to not wrap properly around the block. Next, use an X-Acto knife and carefully cut out one of your case skins. Keep in mind that the template has everything needed to make either a full four-sided case with open top flaps, a full case with interlocked top flaps, or a sealed top case. If you are putting together a sealed case, you don’t need all of the flaps… but, make sure that you keep enough of the unused flaps to have a surface that you can glue the case top over to prevent your wood block underneath from showing. When cutting the skin out, don’t forget to also make the cuts at the edges of the flaps, just don’t cut where you will be folding the paper. I found that it was easier and faster to cut the skin out by making all of the vertical or horizontal cuts at one time, and then going back and making the opposite direction cuts at one time.
If you are making an open top flap case, and you are not going to glue a product image on top of the case that will be showing, you should now paint the top of the wood dowel either a flat back or flat dark grey, and let it dry. Otherwise, you will see the raw wood dowel behind your open flaps when finished.
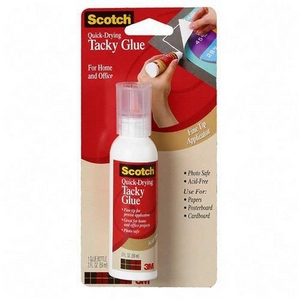
With the skin cut out, you will then need to pre-fold your skin using the 1-pixel brown lines as your folding guides. If you are making a case with open or interlocked top flaps, you will now need to glue the folded over paper for each top flap. I used a fast drying craft glue by Scotch called “Tacky Glue”. This glue is like a white glue, excepts it dries in about 30 seconds when working with paper. It does dry clear, like a white glue.
At this point, you should take a brown pigment ink pen and color over all of the exposed paper edges. A magic marker will work, but if it is water based, the ink will run and bleed. Using a pigment ink pen will reduce the bleeding quite a bit. You need to do this step because the white raw edges of the paper will stand out like a sore thumb, and give away that this is just folded paper. Also, if you don’t do this step now, it will be much harder to control the edge bleeding after the skin has been wrapped and glued onto the wood dowel.
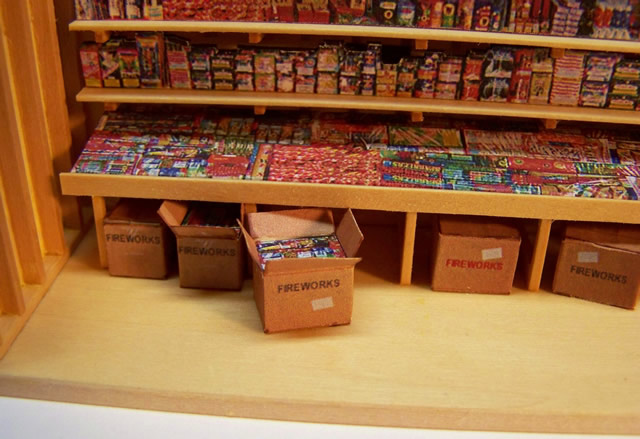
Now you are ready to begin gluing the skin onto your cut wood dowel. Start with the narrow side flap off your end or side panel. Apply a thin layer of glue and glue / wrap your skin around the outside of your dowel, working one side at a time. With the sides completed, you should now glue down all of the narrow bottom flaps to the underside of the wood dowel. If you are making a sealed top case, glue over the narrow top flaps and then your full top flap over those, and you are done. If you are making an interlocked top case, fold your flaps over and interlock as you would a real 1:1 shipping case. If you are making an open top flap case and will be showing some case contents, you will cut and glue this image on top of your wood dowel. On the cases I made, I wanted the open cases to appear like they were full of fireworks, so a glued a 3/8” x 1/2” image of fireworks on top of the dowel. The end result looks pretty realistic.
Once you start putting the shipping cases together, you will find that it goes pretty quickly, especially if you use a quick drying white glue. The first case may take up to 10 minutes to put together, but multiples can easily be done at a rate of one every five minutes.