Back in the late fall of 2006, I received run 217 of OGR magazine which featured an interesting article by Carl Capua entitled "Building a Brick Retaining Wall". Ever since reading that article, I've been looking forward to having the opportunity to use his technique to capture the look and feel of brickwork. Recently, I was able to use what I learned from the article on a small and simple Ash Pit scratch build project.
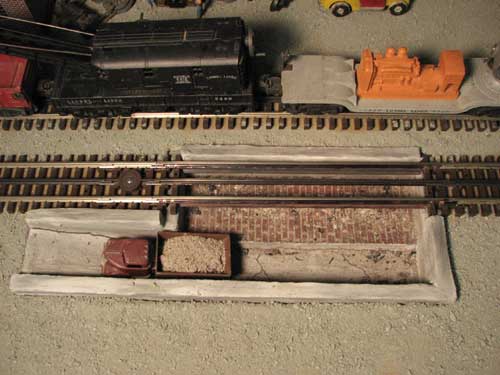
The first step was to build the "pit" itself. I am using Atlas track so I decided to make the ash pit fit under one 10" section of track. This is long enough to park an engine firebox over it, with room to spare, and looked about right for the platform location. Basically the pit should be deep enough to allow a number of ash loads to be dumped from the engine's pan without approaching the height of the rail head, wide enough to fit under the width of the rails and still provide enough support and space. I used 1" deep as the clearance from the I beam that supports the track to the floor of the pit. That would be about 4’ for an actual pit. For the sides and ends, I cut the foam to the right length and width then cut it in half in the 1" dimension. I used a small band saw for all cuts. I had used a Dremel Tool to remove the ties from the center of a 10" track section that would be placed over the pit. I left 2 ties at each end to maintain the proper gauge for the 10” section. I used 2 pieces of 3/8" styrene I-beam over the span to simulate steel beans under the track.
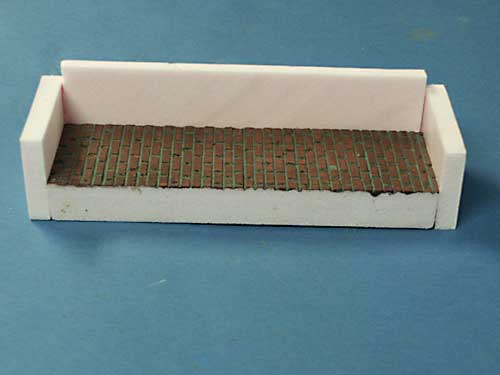
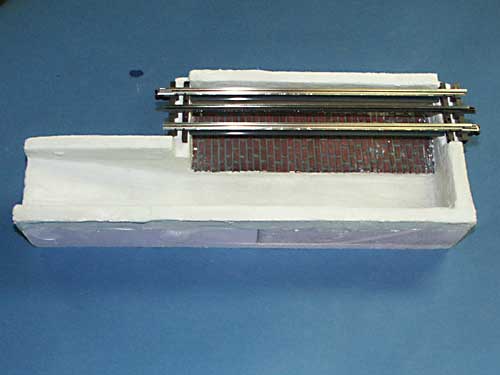
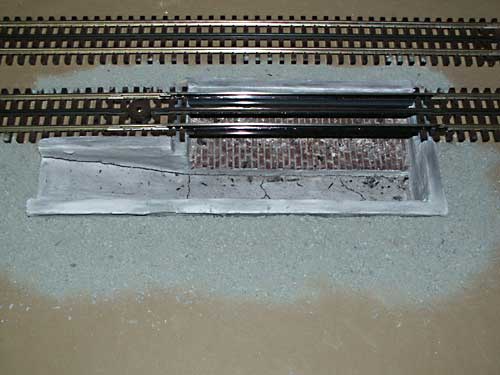
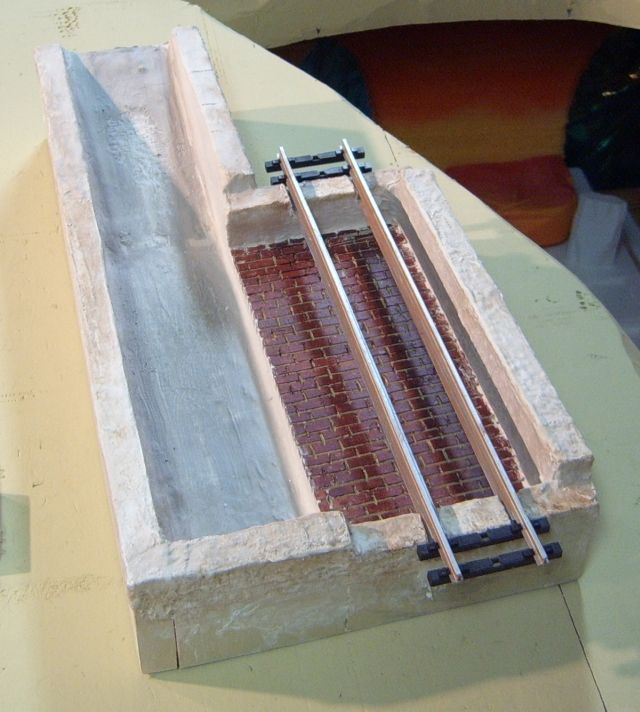
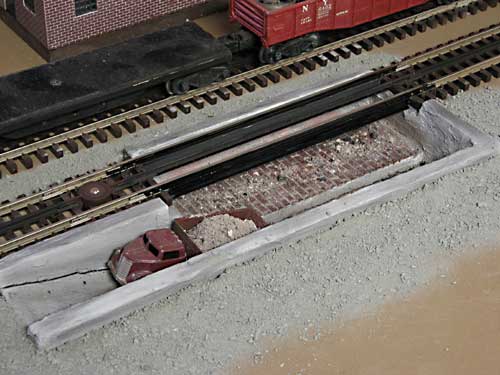
I started construction with a piece of 1" thick, pink foam insulation. This is the same stuff that you get in 2' X 8' pieces at almost any home center such as HD. I used the "pink" variety since that's what I had some scraps of but I think the "blue" version would work as well. The photo below has the 3 sides glued on but I started with just the bottom piece for the brick. Using a small, pencil tipped style of soldering iron, I set about using Carl's technique to simulate the recessed mortar lines that appear between bricks. Please work in a well ventilated area as the fumes that result can be a bit overwhelming. Using a Weller pencil point iron, I found that you needed a steady hand and constant speed to make reproducible mortar lines. I found on my first try that the foam melts quickly so on try 2, I had a much gentler touch and moved the iron quickly across the foam. I still had "fat" grooves where the iron first contacted the foam so on try 3, I put a 2" piece of scrap where the iron first contacted the foam. That way, I had attained constant speed and pressure by the time I reached the desired area. For the vertical joints that define each brick, I found using a Dremel Tool with a small round bit to just nick the foam between bricks worked well but a better way is to just use a small flat blade screwdriver and depress the foam between bricks. This went quickly and was easy to do. Once the pattern was created, the next task was to paint the floor to bring out the brick and mortar work: I used Acrylic paint from Wal-Mart; American Russet Roussatre for the bricks and Pewter Gray for the mortar work. I painted the entire surface with the American Russet Roussatre first then, after it dried, added the Pewter Gray for the mortar. Just wipe the excess off the surface while it is still wet. After the paint was dry, the sides and back of the pit were then glued into place. Early ash pits were emptied by hand while later designed used various forms of mechanisms, the most basic of which was a simple ramp. Looking at the end view in the next photo, you can see how I glued 2 pieces of 1" foam together to get the desired 2" width. Once again, I used the band saw to cut the shape and then glued that to the existing pit. Note that the area where the track goes is slightly lower than the sides. Since the bottom of the track is at platform level and I was going to recess the ash pit in the platform, I wanted the sides of the ash pit to extend 3/8" above the platform so that’s why the sides are a little higher. It’s been my experience that covering foam with plaster cloth improves strength and whatever you finish it with will hold better. It also covers a multitude of sins! I used Woodland Scenic plaster cloth to cover everything that would be visible but the brick floor. It's a good idea to cover the brick to protect it from any plaster cloth that might "get away" when you are installing it. After putting on the plaster cloth and smoothing it out, I went over the surface with plaster of paris (using my finger) to simulate a poured concrete texture. Once dry, I brush painted the entire surface with a white and gray acrylic paint mix to get an aged concrete color. I also used a magic marker to put a few cracks in the concrete then sprinkled some woodstove ashes in the pit. They are not held down since I have an unlimited supply so if I loose a few to the vacuum, it's no problem! I suspect you could stick them down with Dull Cote but I haven't tried that. I have wanted to try using chalk for weathering so I tried that technique for the final weathering. I bought a mix of pastel chalks from Michaels but any craft store would have them. You can simply scrape off a little of the surface of the pastel stick and use a dry brush to "powder" it on. Smear it around a little and Wow- it actually looked pretty good! To hold it in place, I sprayed a light coat of Testors Dull Cote over it. This being my first scratch built, I used several pictures of various types of ash pits so I had a basic concept of the build, but found that most of it was "design as you go". Looking back, it was actually a fun project that turned out OK and the cost was nearly zero since I had everything on hand. If you've never done anything like this before, go for it! Fellow forum member and regular Scenery Section contributor Rand Fredricksen gave this build a shot and you can be the judge of his success! Based on the success I had from my first scratch build, my next project is a little more ambitious. I am building a model of an existing water tower. Again, it's a learning curve for me and since it is made of wood, it could turn into ash for the ash pit if I really mess it up!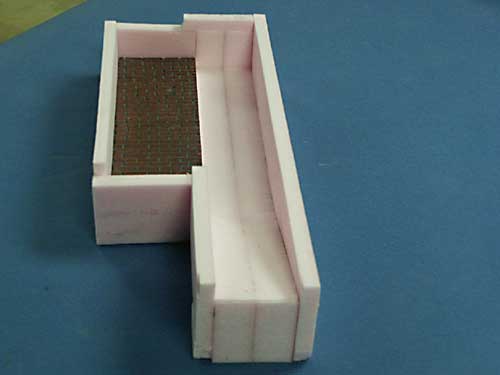
4 comments:
canalman, thanks for the well written and well illustrated how-to. The videos really add a lot to the post!
Hope to see more of your work here.
Good job, Canalman a worthy project, which might be overlooked, especially from diesel fans, jk! Dave G.
what a great project and the videos are fantastic.
What a great way to explain your process.
The mortar is outstanding
Ray
I'm always surprised by the talent exibited here. What nice feature to have on the layout .It will be one of my must do projects. Nice work !!
Post a Comment