Thanks to all of you who visited and voted this past month on the April Token Build. This is the second in an ongoing series of what can best be called a "community build". Every two months, a Token Poll will be posted here on the blog listing a number of choices for the upcoming Token Build. While some may vote merely to see others attempt the build, the concept functions much better if those who take the time to vote also participate in the project. After 39 votes, the Wire Tree Build beat out the other choices to become the build of the month. Five brave souls signed up over on the OGRR Scenery Forum and stuck with it to the end. With their permission, their pictures, hints, and tips have been used to help you with your first attempt at twisting, barking, and dressing a wire tree.
Step One: Find A Tree
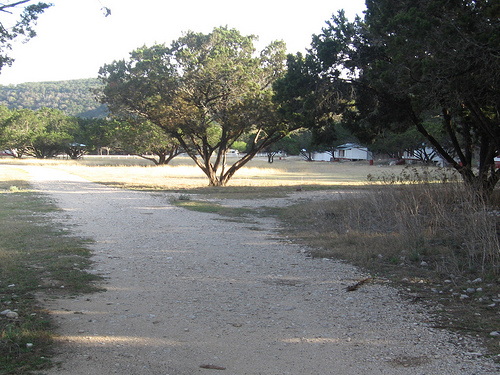
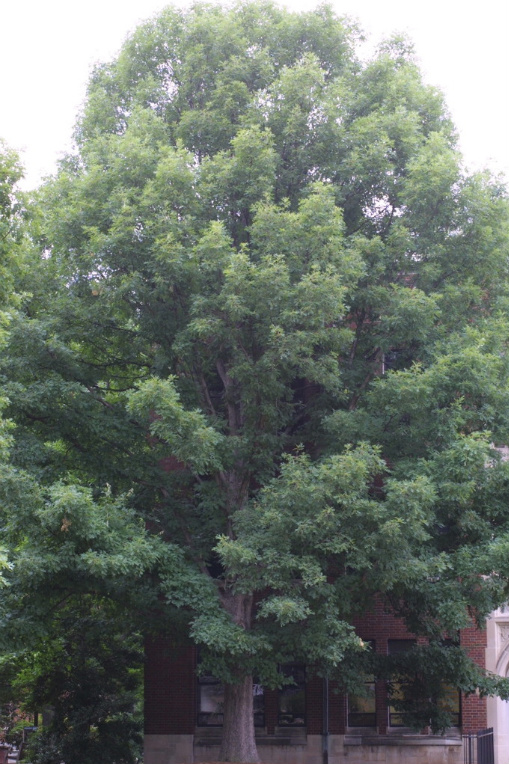
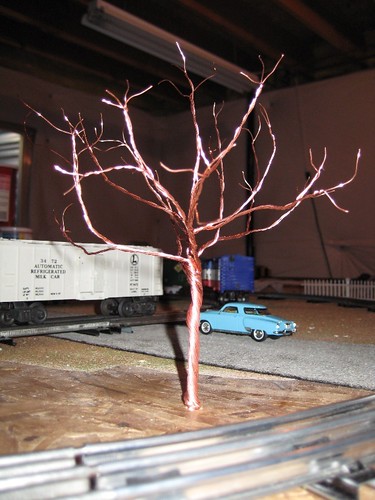
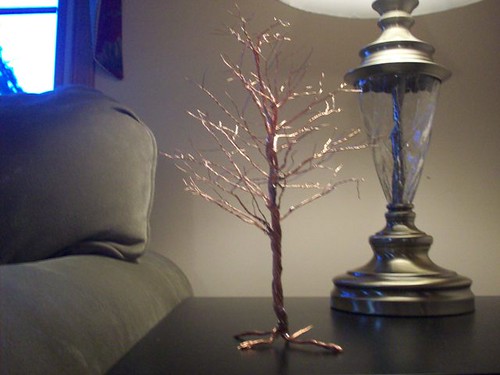
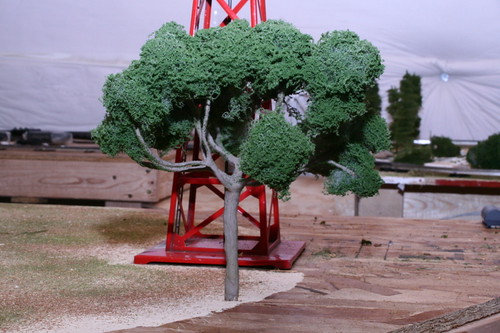
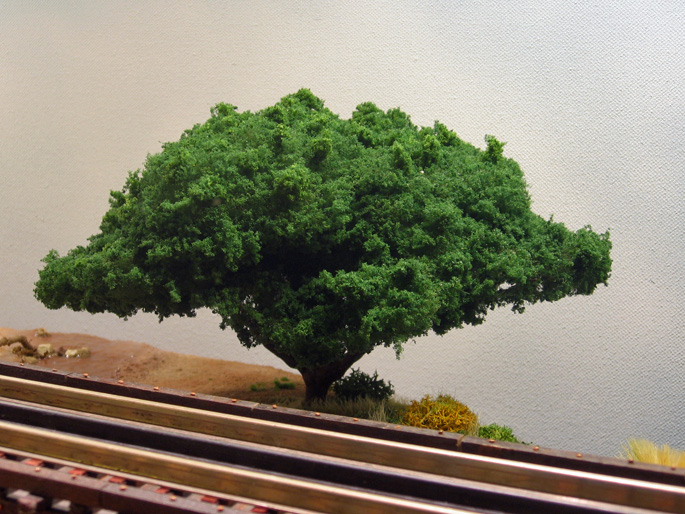
I know this seems like a no-brainer, but many of us modelers have gotten accustomed to settling for the generic plastic, pre-flocked schlock that passes for trees on the mass market in our hobby. Dont get me wrong here, I have had them on my layouts as well and they certainly play their role creating shade along streets and rails. But have you really noticed the amazing variety of trees and their shapes in the real world? Its astonishing when you really start to see the trees and not just the forest! Find a tree whose shape agrees with you in some way ... break out of the box a bit, and use this build as an opportunity to add a little uniqueness to your layout and its scenes. Here are a couple of trees chosen by some of the participants so you can follow their progress through the build.

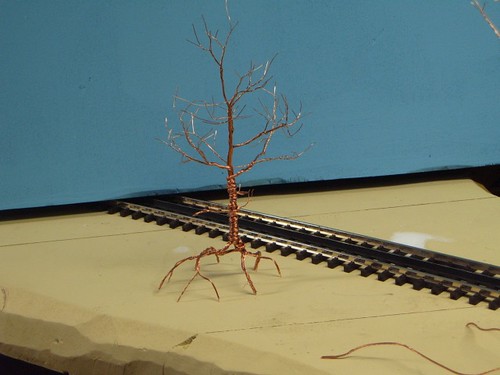
Step Two: Building The Wire Armature
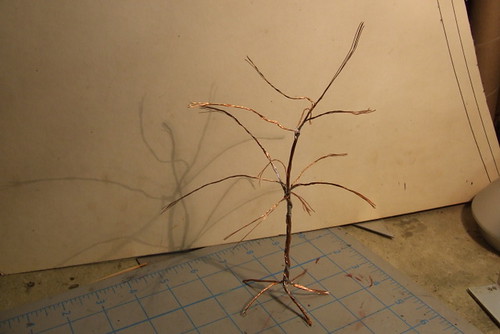
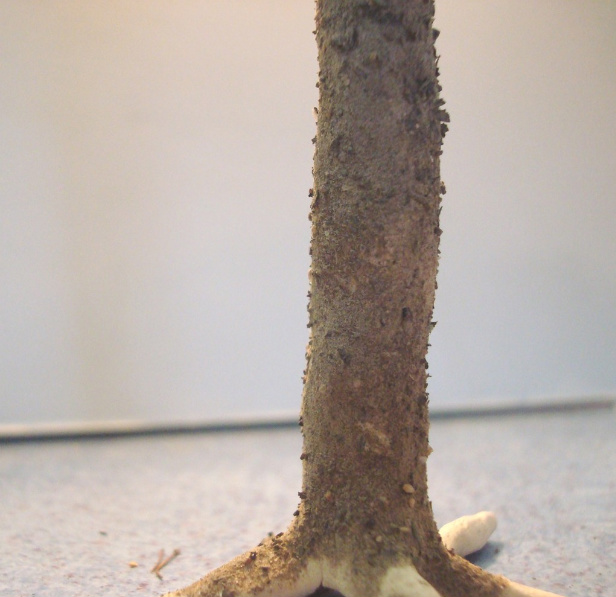
Now for a little info on the first phase of the build: the wire armature. You first need to establish the size of the tree you would like to model. Take into account the girth rather than the height, as the 'gauge' of wire will greatly affect the thickness of both the trunk and the branches. It can be seen that each tree has a unique 'character' which is determined by issues like the number of branches emanating from each split as well as their angle, length and curvature. It's details such as these that give each tree its unique character, and its this kind of build that can accentuate these unique characteristics of the tree type chosen to model.
At your hardware store, you should be able to find a wide assortment of both gauges and makeup. What you are looking for is 'stranded' wire, meaning that instead of a solid, thick wire the wire is instead twisted with smaller pieces of wire. When considering the gauge of wire be aware of the following: thickness of the wire will effect not only the number of branches possible from each 'split' but how thick those end branches will be.
Once you have chosen the gauge the fits your taste, cut two or three sections of the same length, strip the rubber off and twist! I usually secure the base in a clamp and use a wrench to grab the other ends and secure them. While braiding, keep it a little loose and take care to not wind it too tight ... you will have to unravel some ends from the top to create branches.
Step Three: Unraveling Ends for Branches
Once you have braided the wire bundles and un-twisted the major branches of your tree, its now time to unfray the tips of the wires to fill out the branches. Slowly unravel the twisted wires to the point on the main limb where you feel the smaller branches should begin. Then, following the same process as with the trunk, re-twist the branches in bundles of two, three, or four individual wires, leaving individual strands untwisted and pointing out the farther out on the branch you go. These are twigs, not branches so as you go farther out from the trunk, the branches should become smaller, thinner, and greater in number.
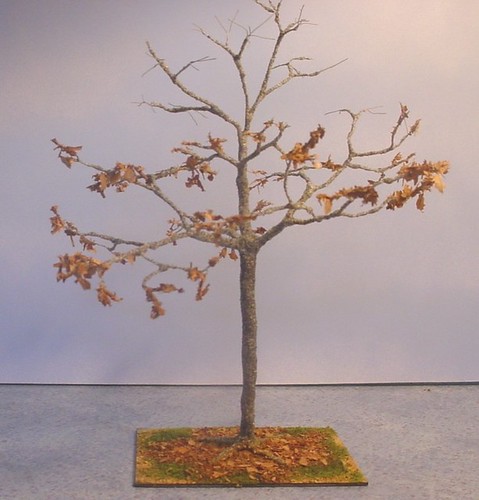
Take some time to really look at the structure of the tree you are modeling ... different species of trees have different makeups: oaks tend to start branching out from the middle with little to no trunk continuing above the break. Elms tend to gradually branch off as the height of the trunk increases. Use this info to decide how many strands you want to use to start simulating branches. of course, the branches at the bottom of the canopy are longer and thicker than the top.

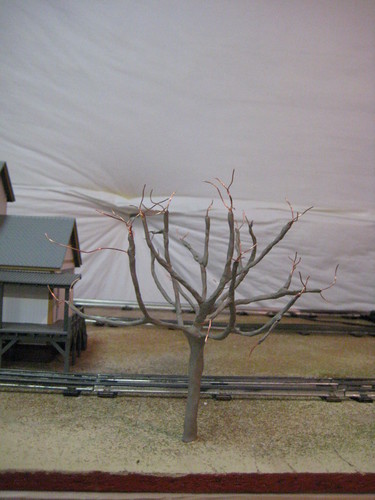
Step Four: Adding The Wood
Once you have the armature twisted and bent to your liking, its time to add the 'lumber'. There are several ways of doing this and modelers have had success with the following products:
1) Wood Filler: The advantage here is that you can choose a realistic color tone pretty easily with this stuff. its malleable and dry time isnt too terrible. Doesnt cling to well to the armature, and will take a few layers ... make sure to wait until each layer is dry before adding to it.
2) Caulking: Easy and cheap, it clings relatively well to the wire, but can get runny until it sets up. by far the messiest of the options here, but one advantage is that the armature can be bent AFTER the caulk dries, offering you a little more flexibility in mounting.
3) Super Sculpey: Found at your local craft supply store, its a clay that hardens in the oven in very little time. Since this is more solid going on, its quite easy to weave and push into every nook and cranny. This also gives you the option of adding details into the clay before you cook it ... knots and broken branches can be added using this method. Keep in mind the clay may shrink a bit after cooking, and it will take on that 'fresh dog poo' color.
4) Mod Podge: This is a tried and true method, which give a lot of control but is very time consuming. The idea is to build up layer upon layer of the 'podge', gradually filling out the tree. While this method is indeed time intensive, it does give the modeler the option of adding texture such as dirt or sand to simulate bark and its unevenness on the tree.

Any of these methods should work well, just go slowly and make sure you get good coverage. problems tend to arise with the thinner tips of the branches ... some of this stuff just doesn't want to stick, or if it does, it ruins the tapering of the limbs. Leave the very tips uncovered if its becomes an issue. Unless you are modeling a leaf-less tree, most of this will be covered in the end. Just let the spray paint do the work for you.
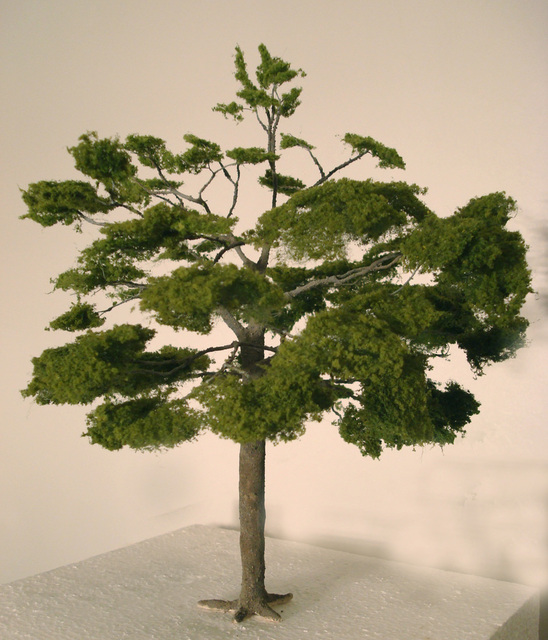
Step Five: Painting and Texturing The Tree
Time to hit it up with some spray paint of your color choice. Choose a latex based paint as it goes on a little thicker and will help coat those tips of the branches a little easier. One hint: experiment with 'textured' spray paints ... they give a nice feel to the trees, and the difference in texture will give just enough of a hint for the bark. Combinations of both the latex and textured paints also gives a nice feel on the tree. To further bring out details, a few alcohol and india ink washes can be used to highlight differences in texture. Dry brushing a lighter shade will also bring out further details.

Another method is to sprinkle texturing agents on the tree while the paint is still wet or after a good dose of Mod-Podge. Here is another opportunity to get outside and enjoy nature a bit ... take a tiny tin or zip-lock bag with you on your next walk with the dog or jog and keep an eye out for interesting colors and textures of sand and dirt: you'll be pleasantly surprised at the discoveries awaiting you!
Step Six: Adding The Greenery
The last step on this wire tree build is the canopy Again there are several ways of doing this, but many have had success using polyfibre as the 'filler' for the bulk of the foliage. Woodland Scenics sells this stuff, but you may even want to take a cheaper route and visit the a fabric store or even the fabric section of your nearest craft store to compare pricing and color selection.
When using polyfibre, its important to make a little go a long way. Tear off a small chunk and start to pull it apart in every direction. a thumb-sized piece of polyfibre can yield a hand size section of pulled fibre: you'll be amazed at how much you can get from very little. its up to you how you want to attach it. Some have used glue, but i just use the tips of the wire at the ends of my branches to lock it into place (the hairspray from the next step will anchor it further). Fill it out, but not too much ... much sure to leave some open areas so that you can see a few of the inside branches through the foliage. this is a more natural look for your tree and gets you away from the cotton-candy look many of these premade hobby store possess.

The last step is attaching the foliage. some use ground cover foam, others just go with the green polyfibre look. Noch sells 'leaves' and although much to large size wise, they make for a pretty good representation of foliage. unscented strong hold hair spray works best for affixing your choice of leafy material to the polyfibre. Spray first, sprinkle 'leaves', spray again to seal the deal. just take care and mask off or try not to hit up the bark or branches with the hairspray ... unless you want leaves of ground foam growing directly out of the bark.

2 comments:
great work.. Think I'll try this in future. Think I'm going to use a wall covering with the texture already present.
thanks again
bill d
I love the section on foliage! First time ever seeing polyfiber - could be a gold mine for me in making our trees!
Post a Comment