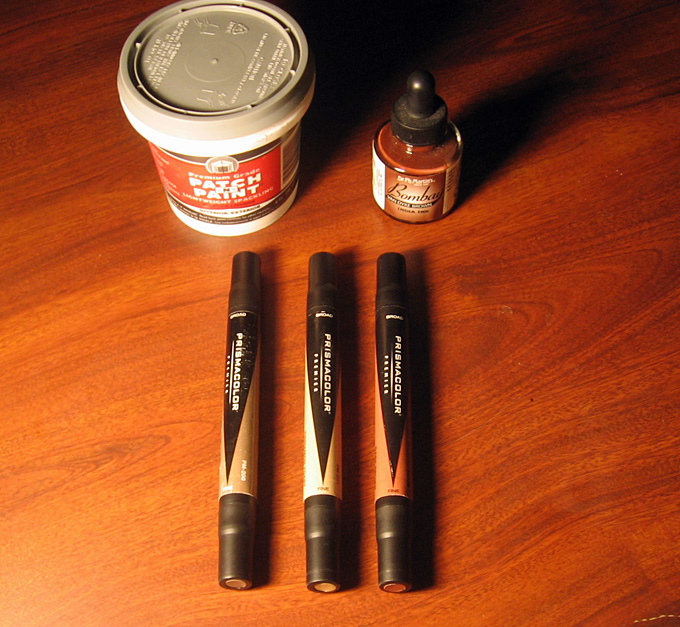
Since my first attempt detailing a Walthers Cornerstone Build Up several months ago, I decided to give it another try using some of the lessons learned not only from that first attempt, but those also gleaned from the generous and timely advice I have received both here and from other sources on the internet. Below you will see a picture of the supplies I used for this project. All should be available at any neighborhood hardware store and art supply.
The first step is to spray paint the entire structure a flat white. I have always used Flat White Gesso in a can, but I'm sure another version of flat white would probably work just as well. I learned from my first build that working directly on plastic causes a number of issues: the most important of which is that paint just doesn't stick very well to the bare plastic ... tends not to adhere and comes off easily. The undercoat of flat white provides a base that color sticks to much better. Please note that it is not advisable or practical to get a thick coat on ... just enough to provide some tack for the brick colors to stick to. Also, too much paint will cause the mortar lines in the bricks to be less pronounced, causing issues further down the line when adding mortar.
That white, although dull, is still a bit too strong. Using a mix of brown (or black if you wish) india ink and alcohol give the white-walls two thorough washes. No need to be neat and tidy, just get it on there. Not much of a difference, but it is noticeable as you can clearly tell from the picture.
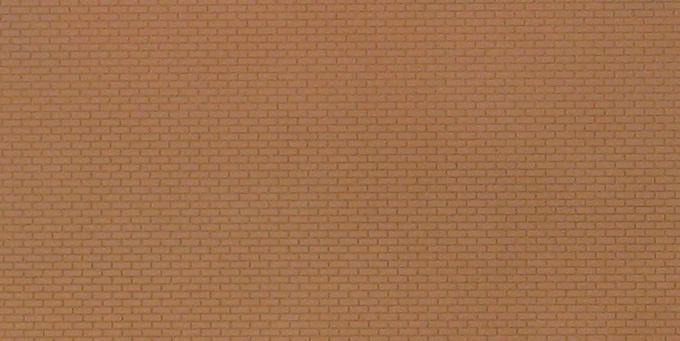
 Using the darkest of the three colors, randomly chose bricks for the darker bricks. I think no more than five per horizontal line of bricks works well for me, though its totally up to you how many you wish. Here is a picture of the darker bricks in my build.
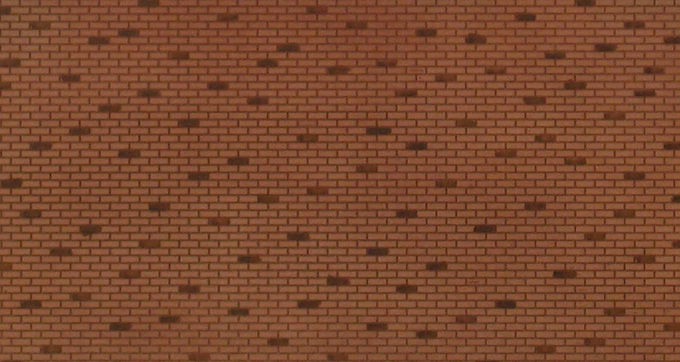
Now, going with the middle shade for the bricks (and the most numerous) fill in the blanks. This should go pretty smoothly and easily as you can just put the marker down and 'draw' the lines on. Keep in mind that you should leave a number of bricks per horizontal line free and un-markered for the lighter shade of bricks. Like the last step with the darker shade, leave four or five bricks per line untouched as seen in the picture below.
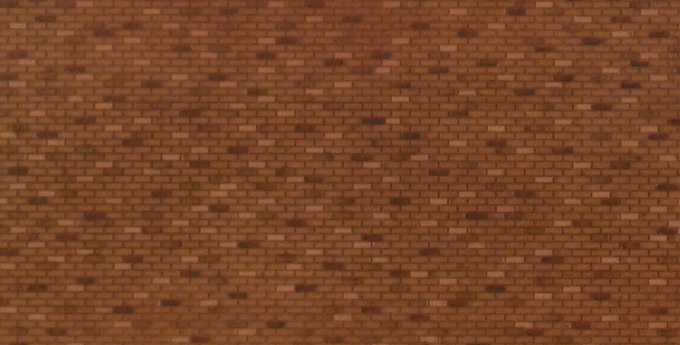
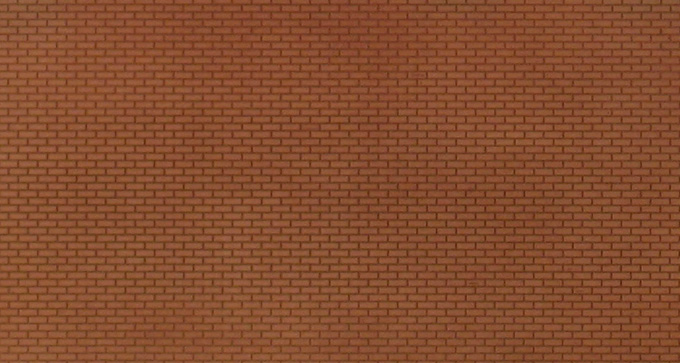
Next, using the lightest shade of brick color you have chosen, hit up those remaining bricks. Also, to further enhance the variety of bricks coloring, chose a few bricks to hit again with the marker. One more pass on individual bricks will darken the color slightly, just enough so that it stands out a bit. The overall effect of this will become evident once you finish the marker routine.
I have had some trouble with these markers staying put during the later stages of this build (ink wash and mortar work). It is advisable to spray the entire model with dull coat to seal the marker coloring in. A very important step, and one that will save much heart-ache in the end. Please note that there may be some bubbling and / or discoloration after spraying with the dull coat. For that reason, don't overdo it with the application of the spray. Take your time and apply one coast and allow it to dry before moving to the next. In the end, it adds some texture to the bricks, but be aware that there may be some changes to the marker work.
Once sealed, its time for the second brown india-ink wash. Again, its up to you but I recommend going at it with a little more vigor than the first wash a number of steps ago. I have found the best approach is to brush two coats directly onto the dull-coat sealed and 'markered' bricks, making sure you wait for the first layer to dry before proceeding to the next wash. Once the two coats are dry, use the Pollock approach. For those of you unfamiliar with this artists work, he would drip and splatter paint on his canvas to achieve his version of artistic beauty. Using the same approach, dip a brush into the india ink and alcohol mix soaking it thoroughly and then 'splatter' the mix directly onto the bricks. Hold the brush about five inches from the bricks and flick. Again waiting for each layer to dry before adding more splatter, I used about four layers of splatter to get the look just right.
 Again, another coating of dull coat to seal the india ink in and avoiding issues with the final step of mortar work.
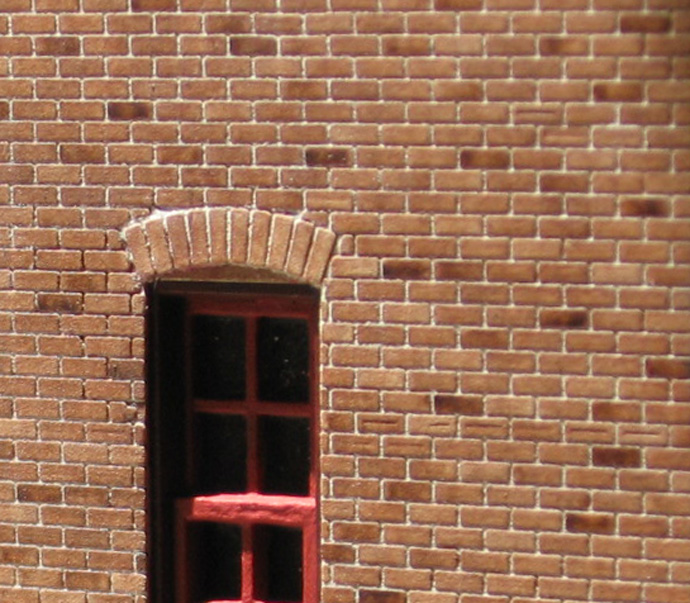
Last, but not least, the mortar. While there are many approaches, I have had relative success using the 'lightweight' spackling. Its not as thick as the normal stuff and cleans up off the brick face much more easily. I just stick a finger in and get some on the tip and then work it in. A little will really go a long way, just make sure that you rub it both length and width wise. Work in small sections at a time so you don't get ahead of yourself or allow time for the spackling to cure too much. On this build I worked on ten rows at a time. Using an old cotton t-shirt dipped in warm water, I then ran the shirt over the mortared area removing the excess. Keep using un-used sections throughout the mortaring process to ensure that the old mortar doesn't get spread around the newer section you are working on (tends to lighten these areas more than the others). It took two layers of the mortar to make it really stand out. Again as with the india ink, let each layer dry for a spell before going after it again. Here is the finished product.
 Sorry about the quality and lighting of the photos. I tried to keep it as uniform as possible throughout the build. I hope you enjoyed this build and I hope you take an opportunity to check out other builds by the many talented and imaginary modelers on the blog. Also, if you haven't already done so, please take time to vote on next month's Token Build.
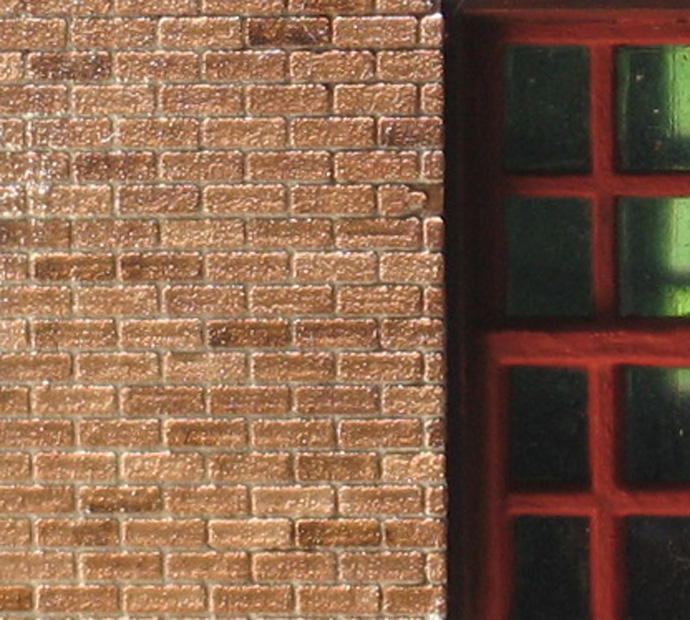
4 comments:
bfishma this is a great article on "how to" mortar.
Very well thought out and explained.
I'm going to give it a try!
Ray
I still say, that's some of the best brickwork I have ever seen. Wonderful!!
thanks fellas! just keep in mind some results may vary ... take care with the dull - coat as it can cause the ink to fade if not done with patience.
Beautiful Fish ! I must say that last photo raises a question ,The finish seems to have a grain to it. How did you do that? I really like the look.
Gizzmo
Post a Comment